Here’s the deal with mani/pedis and me: I’ll go the salon with a friend so we can catch up, talk about boys, and drink wine (complimentary at Passion) then go drink more wine (across the street at Barcelona). Have I been boozing at the Barcelona bar for hours whilst wearing those disposable flip-flops? Maybe. Numerous times.
But I cannot deal with going to the salon alone. I get too bored and antsy; the massage chairs just don’t do it for me, and the employees don’t give a shit about my latest crush or unsolicited dick pic (guys, seriously….). I actually really enjoy painting my nails at home on my porch with a good playlist on (doesn’t that sound delightful?) or whilst watching HGTV (because I feel all DIY inspired). And once I found the most perfect fast-dry topcoat in the universe, it solved the problem of painting your nails then having to be hands-free for 45 minutes to an hour.
Here are the tips, steps, and products for the perfect at-home mani.
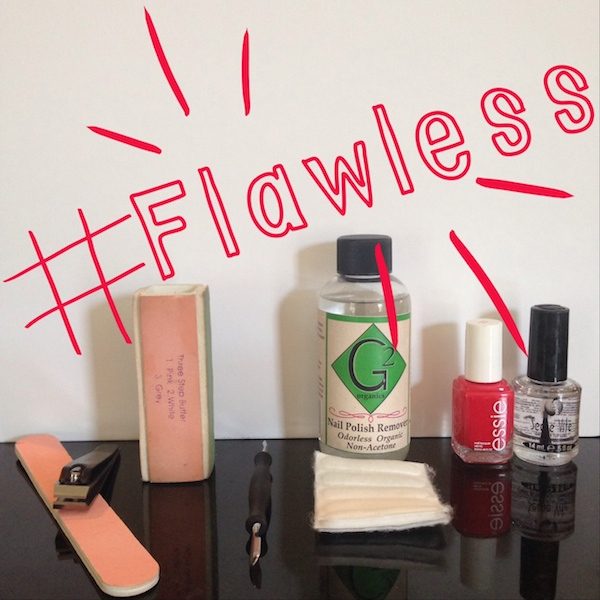
1. Shape. Clip if needed and file to the length and shape you want. A good file is key; it should feel rough enough to do the job, but not like sandpaper on steroids that will take a finger off with one wrong movement (you know the ones). Check out this lesson on grit number–so you don’t want something in the coarse range unless you have acrylics, in which case I’ve already offended you on this blog, so thank you for not giving a shit and coming back. And never get a metal nail file (EW!).
2. Buff. You know how you exfoliate your bod before getting a spray tan so the color goes on smoother and lasts longer? Same thing with nails. I swear by my Swisa four-sided buffer (file, smooth, buff, shine), but I typically just use the smooth and buff sides as you don’t need shine if you plan on polishing. You can pick these up for cheap, but I’ve had mine for ten years (seriously) and it still works like a charm. Don’t get intimidated by this step; it takes like, 2.5 minutes max.
3. Cuticle care. Get one of those tools with the cuticle-pusher-backer on one side and the under-nail-digger on the other (official names). Clean under your nails if needed and push those cutes back if they’re starting to creep up.
4. Use nail polish remover even if you have naked nails. Just a quick swipe to remove any debris from your buffing and oils that get in the way of a long-lasting mani.
5. Paint. Do two coats of polish (if you have the time/patience for three, go for it). Ok so, I have tried many different brands. The longest-lasting I have ever experienced is NARS Nail Polish Collection, but for $20 a bottle, it better be. I love Essie and I 100% believe it lasts longer than OPI if you’re trying to decide between $8 bottles (I never go cheaper than that). I also love Nails Inc. (remember this perfect color?), Butter, and RGB for high-quality, long-lasting color.
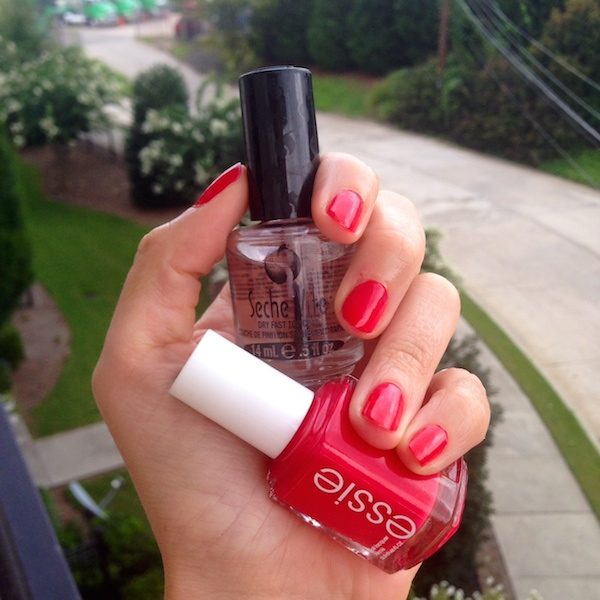
6. Top it off. The Seche Vite topcoat is the absolute must-have game-changer for the at-home mani. Read the full blog here, and pick up two bottles at the drugstore or on Amazon (for $7!) so you can change a friend’s life while you’re at it. Seriously, this stuff is straight wizardry.
And VOILA! Unless you’re a bartender or full-time dishwasher, bite your nails (what are you, five?), or like to drag your fingers across jagged surfaces, your mani should hold on strong for a week or more!
So put your hands in the air and wave ’em like you just don’t care (but again, you really won’t need to wave them that long because of the fast-dry topcoat).
LYLAS,
Ashley
*Pictured is Essie E-nuf is E-nuf. Follow on Instagram @AshHess for the occasional polish porn.